Snowflake
Learn how to setup Snowflake source connection
GrowthLoop Audience Platform connects directly to Snowflake, so you can leverage the customer data in your data warehouse to create audiences with just a few clicks.
Here are the key steps to establish the connection to Snowflake:
- Creating a public/private key pair
- Creating a Snowflake user and role with proper permissions
- Providing the connection information to the GrowthLoop interface during onboarding
Create Public/Private Key Pair
Open your local machine’s command prompt or terminal and run the following command:
openssl genrsa 2048 | openssl pkcs8 -topk8 -inform PEM -out fw_private_key.p8
After running this command, you will be prompted for an encryption password. Please enter any secure password and record this for later use.
Then run the following command:
openssl rsa -in fw_private_key.p8 -pubout -out fw_pub_key.pub
After running this command, you will be prompted for the encryption password set above. Please enter the encryption password and note where your public and private key are stored for later use.
Create the Snowflake User and Role for Connection with the GrowthLoop Application
Login to your Snowflake account with a user who is assigned administrative privileges to manage users and roles. A common admin role with the necessary privileges is ACCOUNTADMIN or SECURITYADMIN.
Then, open a worksheet and run the following commands:
Create a Role
use role <*INPUT_ROLE>*;

create role <*fw_access_role_name*>;
If you encounter any permission errors, ensure you have a properly permissioned role selected in your Snowflake worksheet (pictured in the top right corner of the image below).
IMPORTANT: If running multiple commands, ensure the “All Queries” box is checked
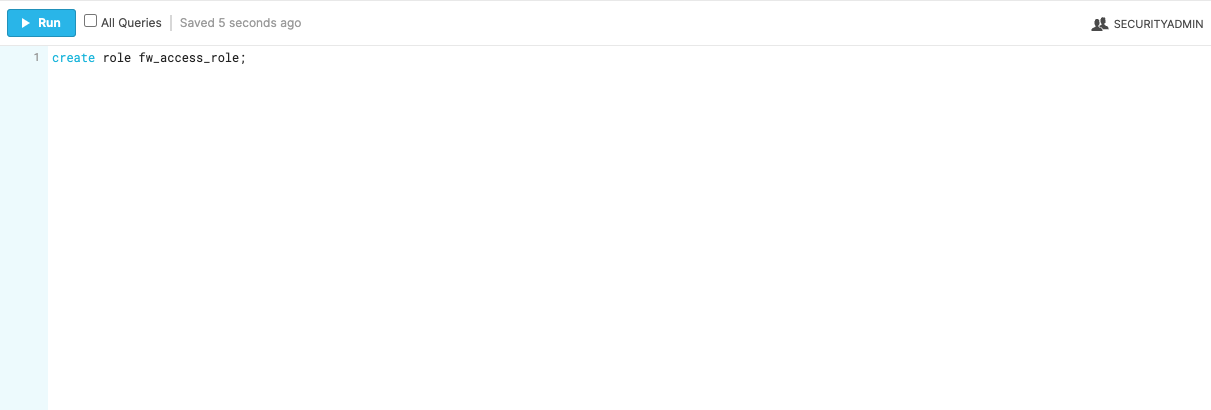
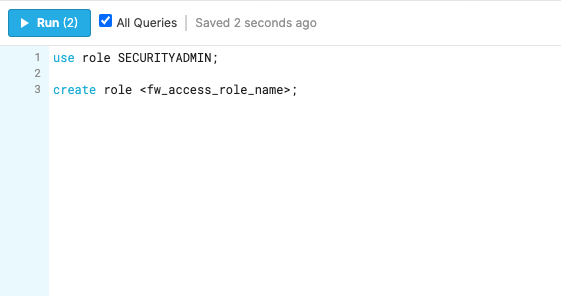
Next, Assign Privileges to the Role
use role <*INPUT_ROLE>*;

grant usage on warehouse COMPUTE_WH to role <*fw_access_role_name*>;

grant usage on database CUSTOMER_DATA_MODEL to role <*fw_access_role_name*>;

grant usage on all schemas in database CUSTOMER_DATA_MODEL to role <*fw_access_role_name*>;

grant select on all tables in database CUSTOMER_DATA_MODEL to role <*fw_access_role_name*>;

grant usage on future schemas in database CUSTOMER_DATA_MODEL to role <*fw_access_role_name*>;

grant select on future tables in database CUSTOMER_DATA_MODEL to role <*fw_access_role_name*>;

//Replace COMPUTE_WH with the name of your data warehouse
//Replace fw_access_role with the name of the role created in the 'Create a Role' step above
//Replace CUSTOMER_DATA_MODEL with the name of the database to be connected to GrowthLoop
Next, Create a User and Assign a Role
use role <*INPUT_ROLE*>;

create user flywheel_service_user password='abc123' default_role = <*fw_access_role_name*> default_warehouse = COMPUTE_WH default_namespace = CUSTOMER_DATA_MODEL;

grant role <*fw_access_role_name*> to user flywheel_service_user;
Lastly, Assign Public Key to flywheel_service_user
use role <*INPUT_ROLE*>;

alter user flywheel_service_user set rsa_public_key='MIIBIjANBgkqh...';

//the rsa_public_key value can be found in the fw_pub_key.pub file created above. Exclude the '------BEGIN PUBLIC KEY------' and '-----END PUBLIC KEY-----' header and footer in this value.
Connect to Snowflake in the GrowthLoop Application
Establish Connection
During onboarding, you will see the options pictured below, choose Snowflake.
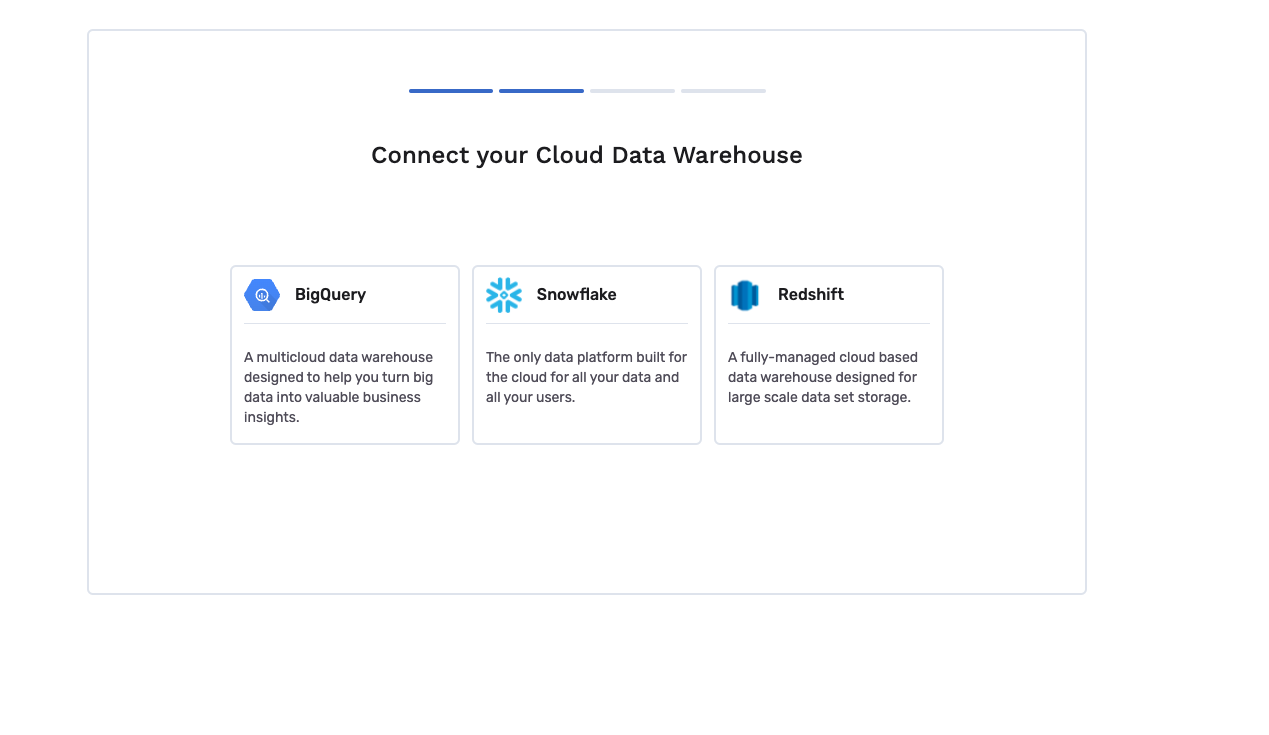
After selecting Snowflake, you’ll be prompted to enter information for the following fields:
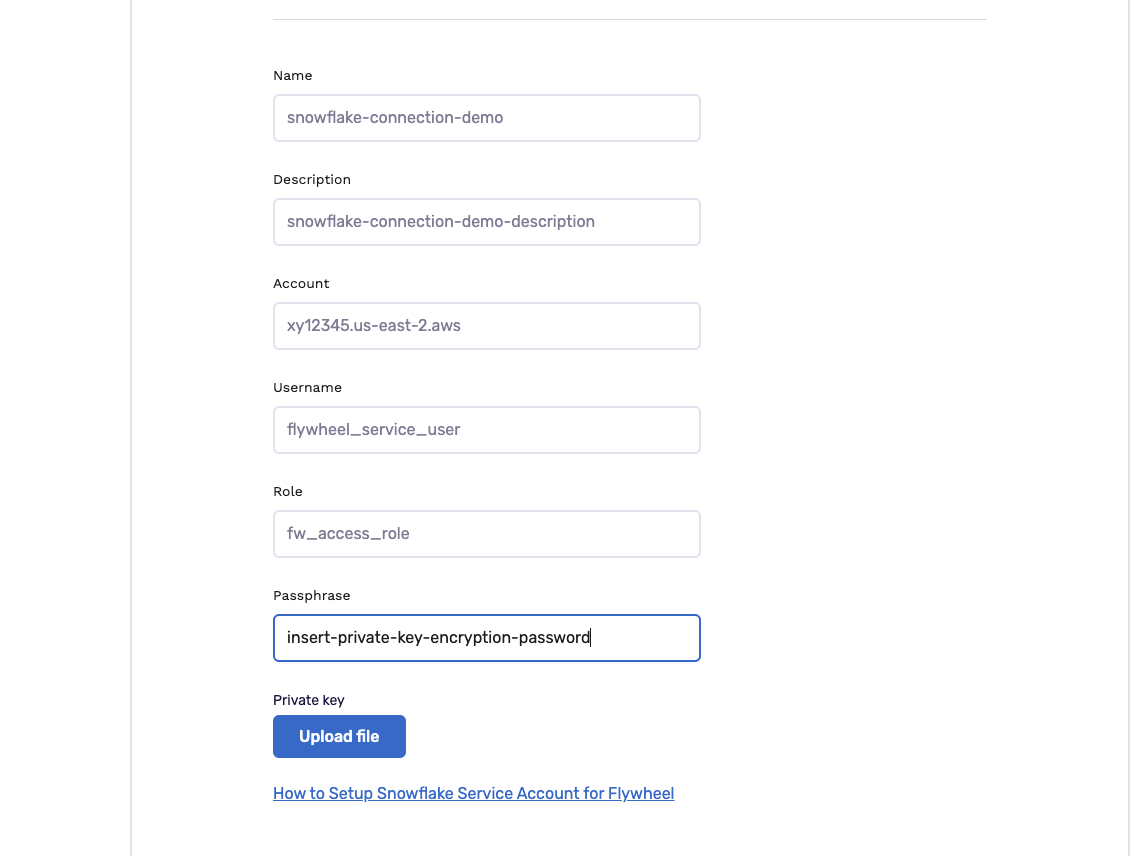
Name: This will be the name used to refer to your Snowflake DWH in the GrowthLoop Application going forward. This can be any name you choose.
Description: This will be the description associated with your Snowflake DWH in the GrowthLoop Application going forward, should you want to provide one. This is optional and can be any description string you choose.
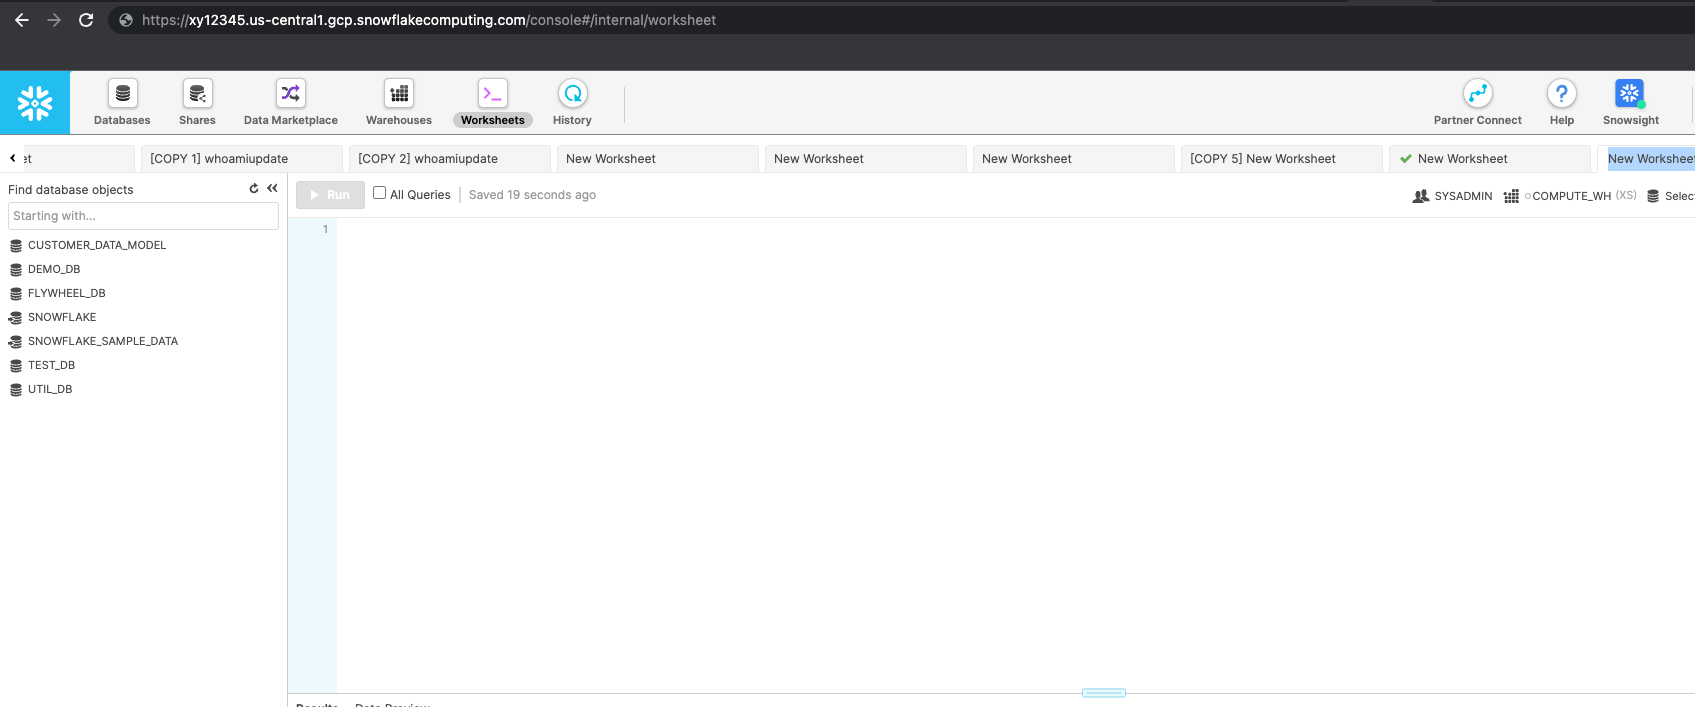
Account: This can be pulled from the URL in your browser when logged into Snowflake. The account in the following screenshot example would be xy12345.us-central-1.gcp
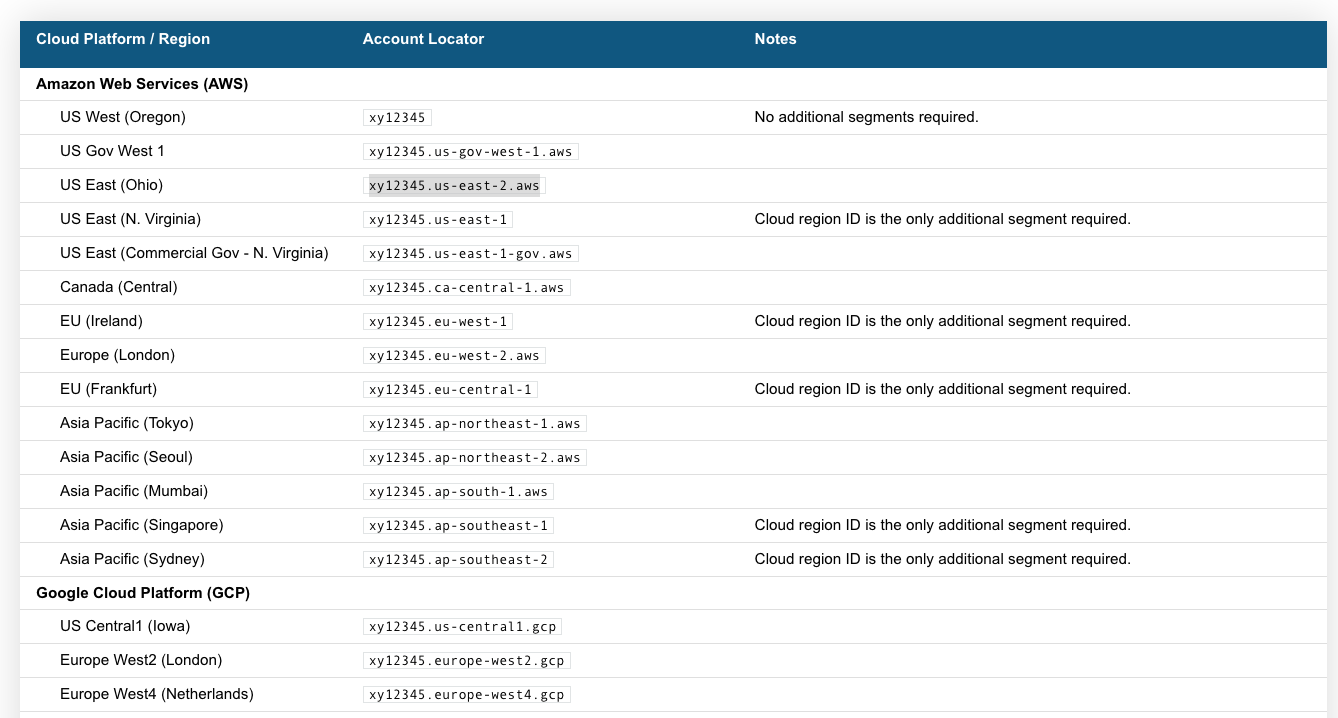
The Account string required will change slightly depending on the cloud provider in which your Snowflake account is hosted. Please refer to the Snowflake documentation below for specifics for your cloud provider (AWS, GCP, Azure, etc.).
Username: This will be the USER created in the “Create Snowflake User and Role” Section of this documentation.
Role: This will be the ROLE created in the “Create Snowflake User and Role” Section of this documentation.
Passphrase: This will be the encryption password used when creating the private key in the “Create Public/Private Key Pair” section of this documentation.
Connect Your Customer Data
After your connection has been established, click continue and you will see the following page:
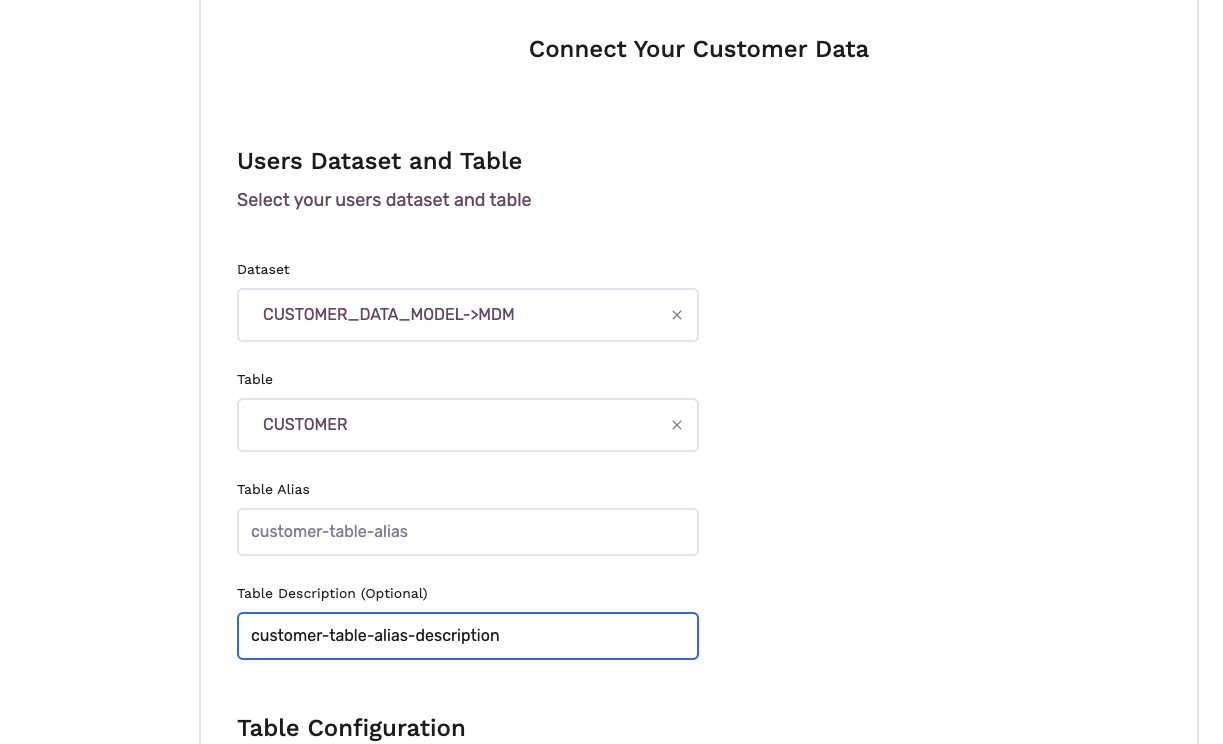
In this section, choose the specific dataset and table in your data warehouse that you will be activating in GrowthLoop
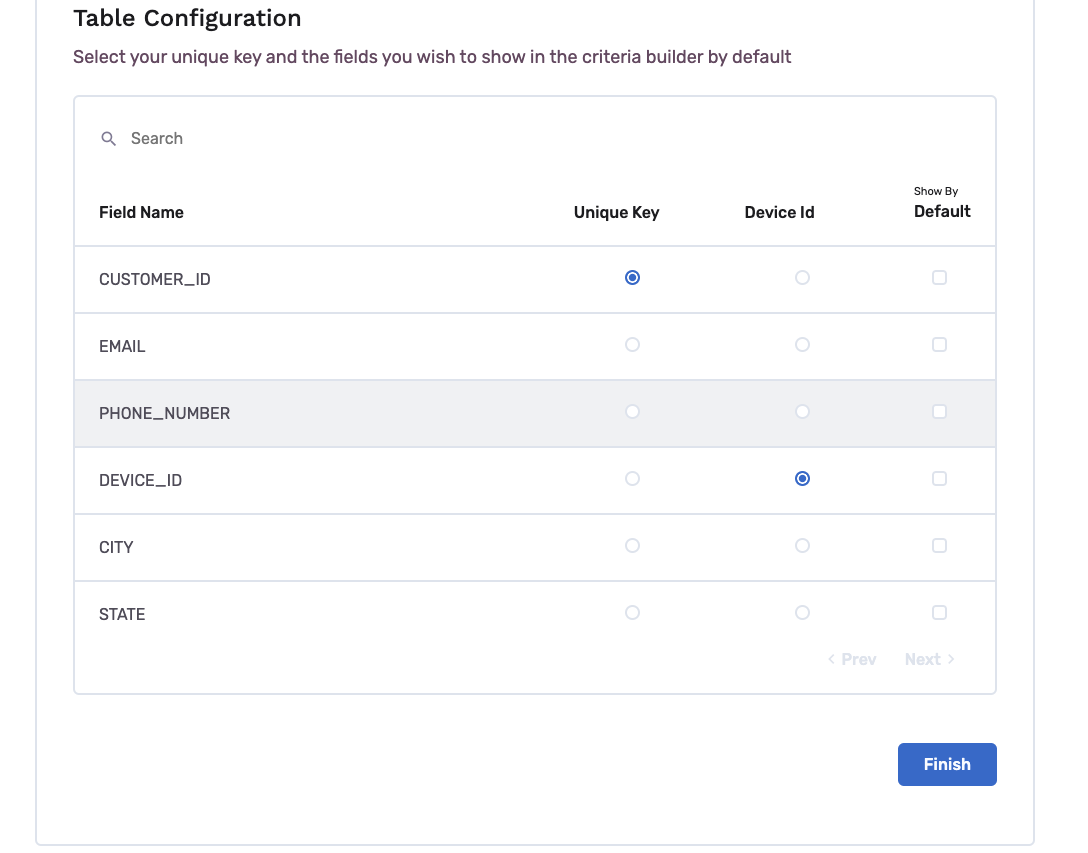
Next, select your unique key and the fields you wish to show in the criteria builder by default. Click finish and you are set to start creating your first audience!
Create FLYWHEEL_SYSTEM Schema
Before exporting audiences, a schema must be established for GrowthLoop to write snapshotting tables. Snapshotting tables will store changes in audience, and sync membership over time. These tables are necessary to maintain ongoing syncs to your destinations.
In the same database where you connected your customer data, create the FLYWHEEL_SYSTEM schema
Create a New Schema
create schema FLYWHEEL_SYSTEM;
IMPORTANT: ensure the schema is named exactly FLYWHEEL_SYSTEM
Grant Privileges to FLYWHEEL_SYSTEM schema
grant all on schema FLYWHEEL_SYSTEM to role fw_access_role;
//Replace fw_access_role with the name of the role created in the 'Create a Role' step
Create Storage Integration
Snowflake storage integration allows GrowthLoop to export data to your marketing platforms. This data is exported and deleted after it’s been exported and not stored on the GrowthLoop system.
For SaaS
Create a new storage integration in your Snowflake instance to allow writing to temporary bucket to enable exporting
create storage integration flywheel_app_gcp
  type = external_stage
  storage_provider = gcs
  enabled = true
  storage_allowed_locations = ('gcs://flywheel-prod-328213-outgoing/exports/');
Then provide GrowthLoop with the Service Account for the integration - STORAGE_GCP_SERVICE_ACCOUNT.
DESC STORAGE INTEGRATION flywheel_app_gcp;

+-----------------------------+---------------+-----------------------------------------------------------------------------+------------------+
| property                    | property_type | property_value                                                              | property_default |
+-----------------------------+---------------+-----------------------------------------------------------------------------+------------------|
| ENABLED                     | Boolean       | true                                                                        | false            |
| STORAGE_ALLOWED_LOCATIONS   | List          | gcs://mybucket1/path1/,gcs://mybucket2/path2/                               | []               |
| STORAGE_BLOCKED_LOCATIONS   | List          | gcs://mybucket1/path1/sensitivedata/,gcs://mybucket2/path2/sensitivedata/   | []               |
| STORAGE_GCP_SERVICE_ACCOUNT | String        | [email protected]                  |                  |
+-----------------------------+---------------+-----------------------------------------------------------------------------+------------------+
Updated 2 months ago
